
Kick-Starting a Sophisticated ESLint and Prettier Workflow with Vue CLI 3 in a few Minutes
Something special is developing with Vue CLI 3. At the time of this writing Vue CLI is in beta status. It is already pretty awesome! To get a brilliant overview, read Vue CLI 3: A Game Changer For Frontend Development.
With this article, I want to share my early experience with Vue CLI regarding ESLint and Prettier. Vue CLI has a pretty neat plugin architecture. It is built from ground up to generate Vue.js projects that leveraging ESLint and Prettier. Vue’s lead developer Evan You and his team do a great job to integrate best practices from the community and cutting edge technology (e.g., Cypress). However, the project is in an early state and heavily under development.
How the ESLint Workflow looks like
I had a hard time to get my desired ESLint and Prettier setup entirely up and running. My goal was to establish the same workflow as I described in my post from the beginning of the year:
- ESLint only for static code analysis
- Prettier only for code formatting
- Using an ESLint config like eslint-config-standard or eslint-config-airbnb
- Using special ESLint rules for Vue.js
- ESLint works within Vue Single File Components
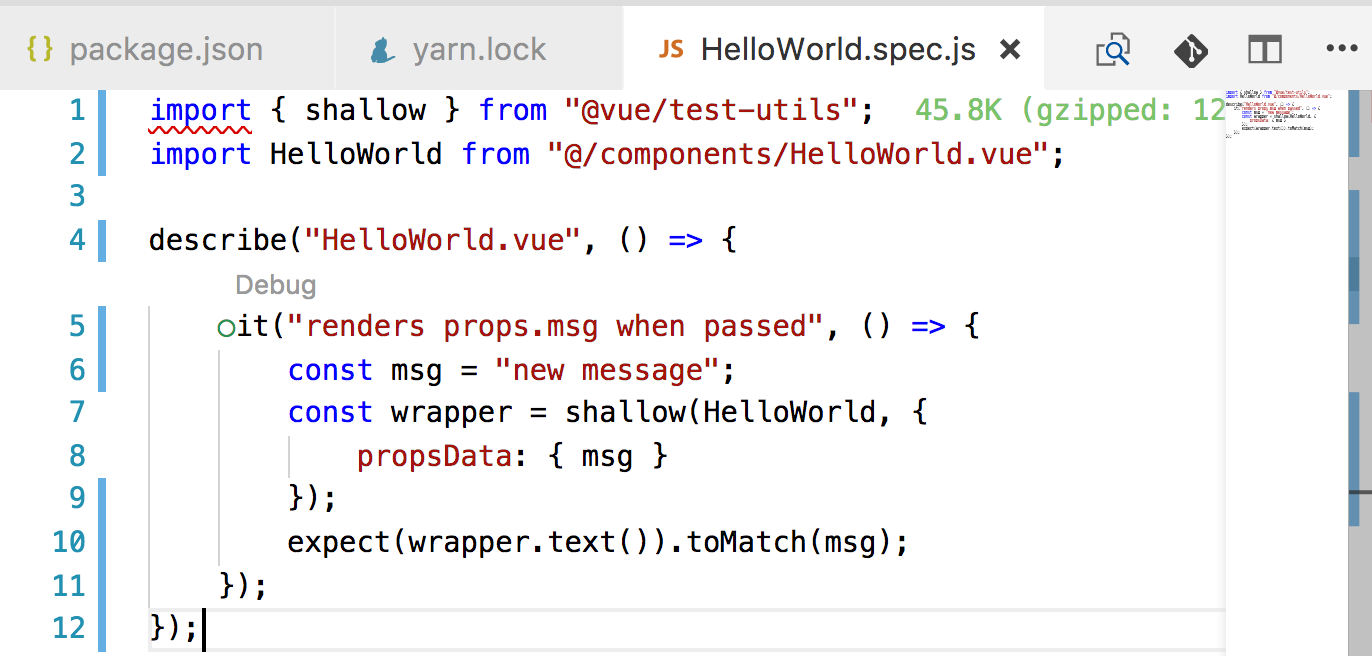
- ESLint works with Jest
- Linting works from the CLI
- Linting works from IDEs (Visual Studio Code and IntelliJ)
In this post, I do not cover the setup of IDEs. Take a look at my previous article on this topic to configure Visual Studio Code and IntelliJ.
95% is Working out of the Box with Vue CLI 3
In order to not create a false impression with this article, almost everything is working by just generating your project with Vue CLI. However, I had a hard time to get ESLint working with Jest in my IDE as you can see in the next picture. From the command line, everything seems to work – there were no errors.
Generating the Project with Some Manual Adjustments
Vue CLI is easy to use. Step one, generate the project without even to have vue-cli installed globally on your machine.
$ mkdir vue-project && cd vue-project
$ npx -p @vue/cli vue create.
In the following, I just list the relevant options. Feel free to select other options, too.
- Select "manually select features"
- Select "Linter / Formatter" and "Unit Testing"
- Select "ESLint + Prettier"
- Select "Lint and fix on commit"
- Select "Jest"
- I selected "In dedicated config files" (but it doesn’t matter what you choose)
You can read more about all the options in the official documentation.
Now, we install some additional Vue CLI ESLint plugins. In my example I want to use ESLint Config for JavaScript Standard Style as this is compatible with my "ESLint for analysis and Prettier for formatting" approach as described in more detail here.
$ yarn add —dev @vue/eslint-config-standard
Then, linting from the command line worked for me as expected.
$ vue-cli-service lint
Unfortunately, I had problems within my IDE with Jest test files. I had to install the following package to solve the problem.
$ yarn add --dev babel-preset-env
Then, I had to adjust the .babelrc file located in the root folder:
{
  "presets": [
    [
      "env",
      {
        "modules": false
      }
    ]
  ],
  "env": {
    "test": {
      "presets": ["env"]
    }
  }
}
In order to get the same ESLint workflow as described in my previous article, I had to replace the content of the ESLint config file located in the root folder (.eslintrc).
{
  "root": true,
  "extends": ["prettier", "prettier/standard", "plugin:vue/recommended"],
  "plugins": ["vue", "prettier"],
  "rules": {
    "prettier/prettier": "error"
  }
}
With this small adjustments, my desired setup is working.
Some Lessons Learned
Vue CLI has a great plugin architecture. ESLint config and plugin modules are encapsulated within plugins with a pattern of @vue/eslint-. This adds another indirection to the whole setup, however you can easily find out which npm modules get installed.
As an example, @vue/eslint-config-standard installs the following crucial modules as dependencies:
Conclusion
Vue CLI rocks! Setting up an advanced ESLint / Prettier / Vue.js Workflow requires only a few steps. Before Vue CLI, many manual steps were needed since many npm modules are involved.
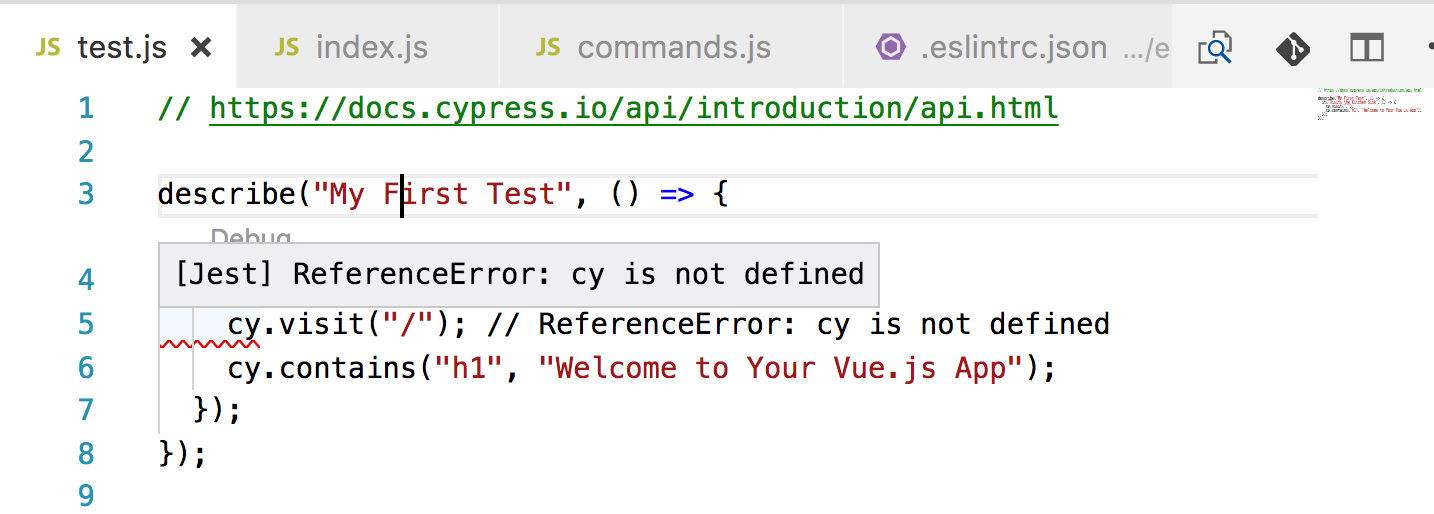
However, I had some issues with ESLint and unit testing as well as e2e testing. Currently, I still have issues with Cypress test files.
Nevertheless, I think in the near future, such problems regarding ESLint setup will disappear. Vue CLI’s concept is designed for such a workflow.